The safe distance from a cliff edge is not a fixed number, but a judgment call based on visible geological evidence of instability.
- Active erosion forces like freeze-thaw cycles and tidal scouring are constantly weakening Canada’s coastlines.
- Recognizing warning signs such as fresh rockfall, water seepage, and tension cracks is more critical than following a generic rule.
Recommendation: Before approaching any cliff edge, conduct a visual risk assessment of the ground beneath your feet and the cliff face itself. When in doubt, double your estimated safe distance.
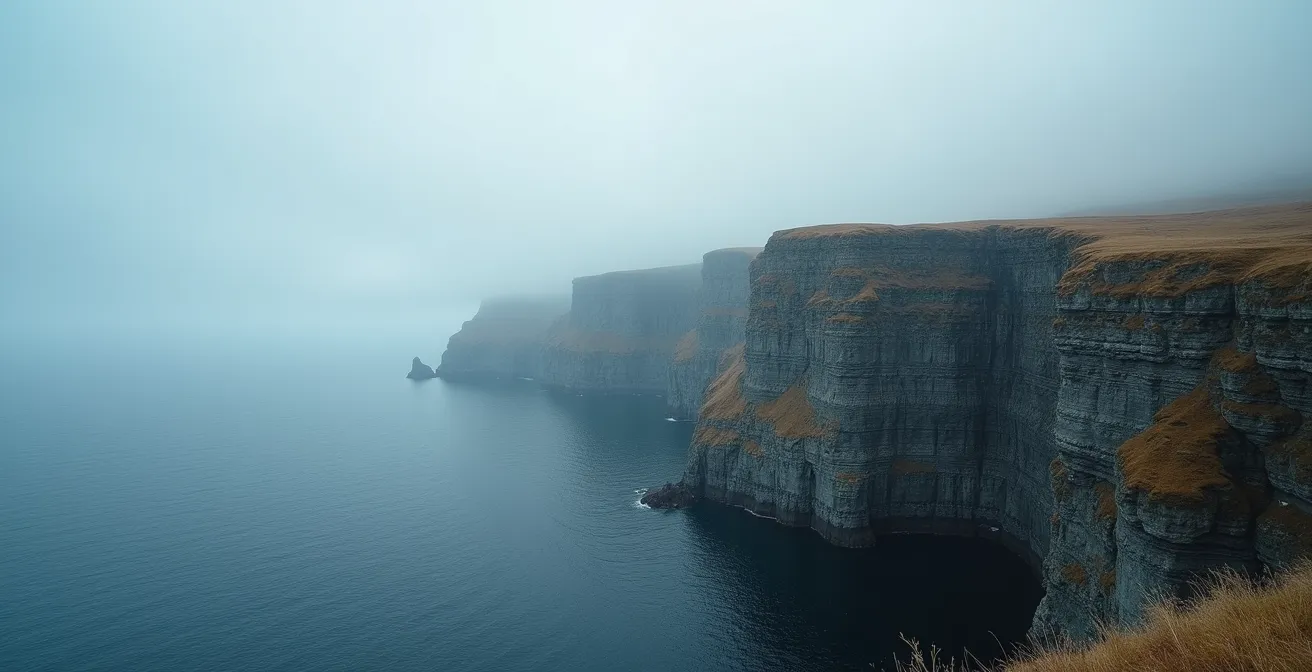
Approaching the dramatic cliffs of Gros Morne National Park, the temptation is undeniable: get just a little closer for that perfect, unobstructed photo of the fjord-like landscape. Most visitors rely on a vague sense of caution, assuming that staying a few feet back from the precipice is enough. Park signs advise staying on marked trails, but they often don’t explain the dynamic and invisible forces at play right under your feet. The common wisdom is to simply “be careful,” but this advice is dangerously inadequate when dealing with active geological coastlines.
The problem is that these cliffs are not static monuments. They are living geological features, constantly being shaped by powerful forces. The standard safety advice fails to address the specific, localized risks that can lead to sudden collapse. What if the real key to safety wasn’t a generic rule of thumb, but the ability to read the landscape like a professional? This guide departs from simplistic warnings to adopt the mindset of a geological risk assessor. We will not give you a magic number in metres for a safe distance; instead, we will teach you to identify the specific signs of instability, understand the mechanisms of erosion, and make informed decisions based on evidence.
This approach transforms you from a passive tourist into an active observer, capable of appreciating not just the beauty of the landscape, but the immense power that created it. By understanding the ‘why’ behind the risk—from the tectonic history of Gros Morne to the relentless tidal power in the Bay of Fundy—you will learn how to determine a truly safe viewing distance for yourself. This knowledge is your most essential piece of safety equipment, applicable to any dramatic coastline you explore in Canada and beyond.
To help you develop this critical eye, this guide breaks down the key geological and environmental risks you’ll encounter at some of Canada’s most famous coastal parks. We’ll examine the specific forces that make these landscapes both beautiful and hazardous.
Summary: A Geologist’s Guide to Canada’s Coastal Hazards
- Why are the Gros Morne Cliffs So Steep: Tectonic Plates or Glacial Scouring?
- The Tripod Placement Mistake That Causes Cliff-Edge Falls
- The Trail Closure Sign You Should Never Ignore on the West Coast
- When Does the Famous Pacific Coastal Fog Roll In and Out of Tofino?
- Do You Need a Guide or a Permit to Hike the Remote North Coast of Vancouver Island?
- Why the “Rule of Twelfths” Matters for Your Beach Walk Safety?
- Why the Flowerpot Rocks Are Doomed to Collapse Eventually?
- How to Find Fossils at Joggins Fossil Cliffs Without Breaking the Law?
Why are the Gros Morne Cliffs So Steep: Tectonic Plates or Glacial Scouring?
The sheer, dramatic profile of Gros Morne’s cliffs is the product of a violent and epic geological history. The answer to their steepness is not one force, but a combination of two: deep-earth tectonics followed by surface-level glacial carving. The foundation of this landscape was laid hundreds of millions of years ago when plate tectonics thrust a massive portion of the Earth’s mantle and oceanic crust onto the continental margin of North America. This event, known as obduction, created the unique rock formations like the Tablelands, which are part of a geological history that, as UNESCO reports, presents a complete portrayal of these geological events.
These ancient, resilient rocks provided the raw material, but it was the more recent Ice Ages that sculpted them into the fjords and cliffs we see today. Massive glaciers, thousands of feet thick, flowed through the region, scouring valleys and sharpening peaks. As the glaciers retreated, they left behind over-steepened U-shaped valleys and sheer cliff faces, a landscape that is geologically very young and still actively adjusting to the removal of the ice’s immense weight. This “glacial rebound” and ongoing erosion mean the cliffs are not static relics but are in a constant, albeit slow, state of change.
Understanding this dual origin is crucial for risk assessment. The tectonic history created fractured, complex rock structures, while the glacial scouring left them in an inherently unstable, vertical state. This is why you must look for signs of active erosion. These include:
- Fresh rockfall debris at the base of cliffs, indicating recent collapse.
- Visible cracks in the rock face, particularly those that widen due to Newfoundland’s spring freeze-thaw cycles.
- Vegetation growing from cliff faces, where roots act as wedges, accelerating the breakdown of the rock structure.
- Water seepage patterns, which can lubricate internal planes of weakness within the rock mass, preparing them for failure.
These are not just passive background details; they are active warning signs that the landscape is still evolving. Ignoring them is to ignore the very processes that created the view you came to admire.
The Tripod Placement Mistake That Causes Cliff-Edge Falls
For photographers, a tripod seems like an instrument of stability. However, when used near a cliff edge, it can become a tool of catastrophic failure. The most common mistake is not simply placing it too close to the void, but a fundamental misunderstanding of load-bearing physics on unstable ground. Many photographers focus on getting the tripod head level, without assessing the integrity of the surface under each of the three feet. On a seemingly solid rock ledge, the ground can be a thin, cantilevered shelf of rock, weakened by unseen cracks.
A tripod concentrates the entire weight of your expensive camera gear, plus any downward pressure you apply, onto three very small points. If one of those points is placed on a weak section of rock, it can initiate a localized failure. This is especially true on the weathered, fractured rock common along Gros Morne’s coast. What appears to be solid bedrock might only be a thin crust over a void, or a piece of rock waiting for a final push to break free. The pressure from a single tripod leg can be that ‘final straw’.
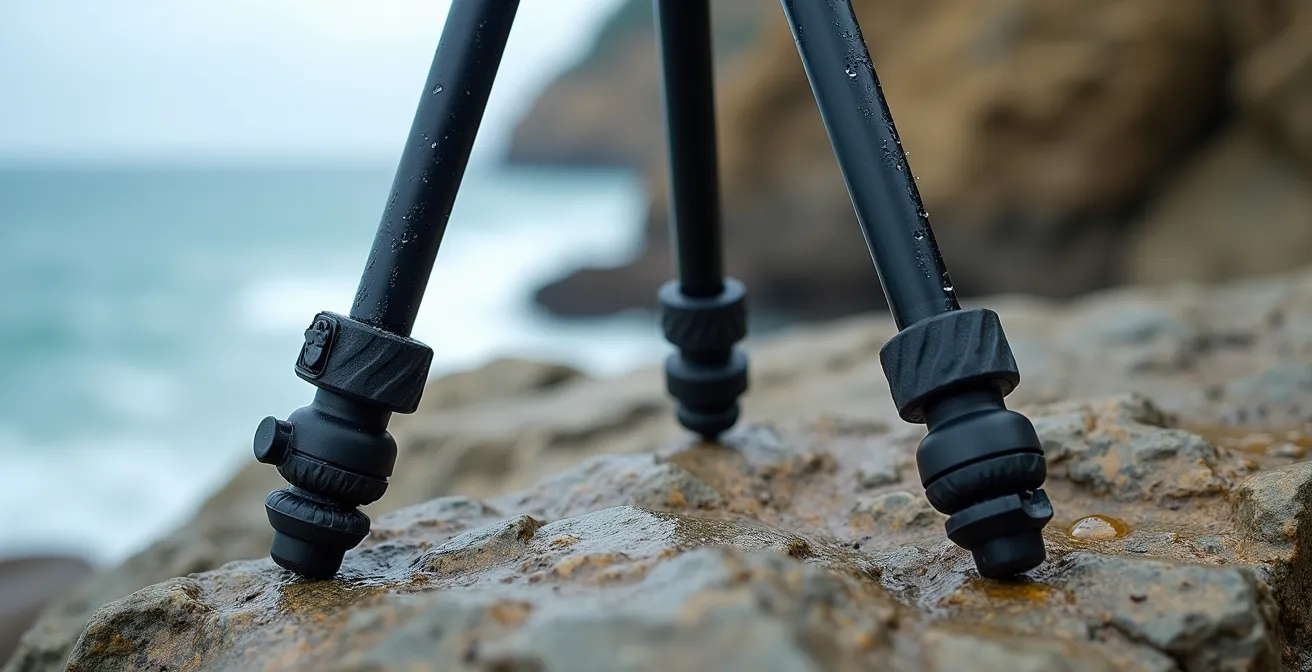
The correct approach is to think like an engineer. Before setting up, visually inspect and tap the ground with your foot where each leg will stand. Does it sound hollow? Do you see cracks radiating from the area? The safest placement involves creating a wide, stable base with the tripod’s center of gravity and your own body positioned well back from the edge. Always keep two legs of the tripod and both of your own feet on the “inland” side of any visible fissure or crack in the rock. The goal is to ensure that even if the ground directly at the edge were to give way, your entire setup would remain on solid footing.
Ultimately, no photograph is worth the risk of a miscalculation. Treat every cliff-edge surface as potentially compromised and prioritize stability and distance over the perfect angle.
The Trail Closure Sign You Should Never Ignore on the West Coast
On the rugged trails of Canada’s west coast, a “Trail Closed” sign is not a suggestion; it is an expert directive based on immediate, unseen danger. Ignoring such a warning is a gamble against professional risk assessment, and the consequences can be severe, both physically and financially. Often, these signs are posted due to “slope instability,” a term that indicates recent geological movement, significant erosion, or structural weakness that makes the trail impassable. This is frequently triggered by heavy rainfall or the powerful freeze-thaw cycles of spring, which can loosen entire sections of a hillside.
Violating a posted closure is a serious offense under the Canada National Parks Act. Beyond the legal ramifications, it carries significant personal risk. Search and Rescue (SAR) teams in provinces like British Columbia are staffed by highly skilled volunteers, but their operations are expensive and dangerous. If you require rescue from a closed area, you may be held personally liable for the full cost of the operation. As official data shows, complex missions can be incredibly costly; records indicate that SAR operations in remote terrain can exceed $10,000. This financial burden is in addition to the fact that your insurance claims may be voided if it’s found you willingly entered a prohibited zone.
The decision to close a trail is never made lightly. It is based on direct observation by park wardens and geologists who are trained to spot subtle signs of impending failure that an average hiker would easily miss. They might have observed new tension cracks appearing at the top of a slope, heard rockfall, or noticed changes in water flow that signal a heightened risk of a landslide. By ignoring the sign, you are not just breaking a rule; you are walking into a situation that trained professionals have already deemed unacceptably hazardous.
The sign represents a barrier between you and a known, active hazard. The safest and most responsible action is always to respect it, turn back, and choose an alternative route.
When Does the Famous Pacific Coastal Fog Roll In and Out of Tofino?
The iconic fog of Canada’s Pacific coast, particularly around Tofino, is not just an atmospheric element; it’s a significant safety hazard that can materialize with astonishing speed. This advection fog typically forms during the warmer months, from late spring to early fall. The phenomenon occurs when warm, moist air from the Pacific Ocean drifts over the cold, upwelling waters of the California Current just offshore. The air is rapidly cooled to its dew point, causing moisture to condense into a thick, disorienting blanket of fog that then rolls inland, engulfing the coastline.
Unlike weather systems that are tracked on a forecast over days, this type of fog can form and dissipate in a matter of hours, often influenced by daily temperature shifts and tidal flows. It is most common in the morning and evening when the temperature difference between the air and sea is most pronounced. A clear, sunny day can turn into a zero-visibility situation in under an hour, trapping unprepared hikers on exposed headlands or coastal trails. This rapid change is a serious risk, as visibility can drop to just a few metres, completely obscuring cliff edges, trail markers, and the incoming tide.
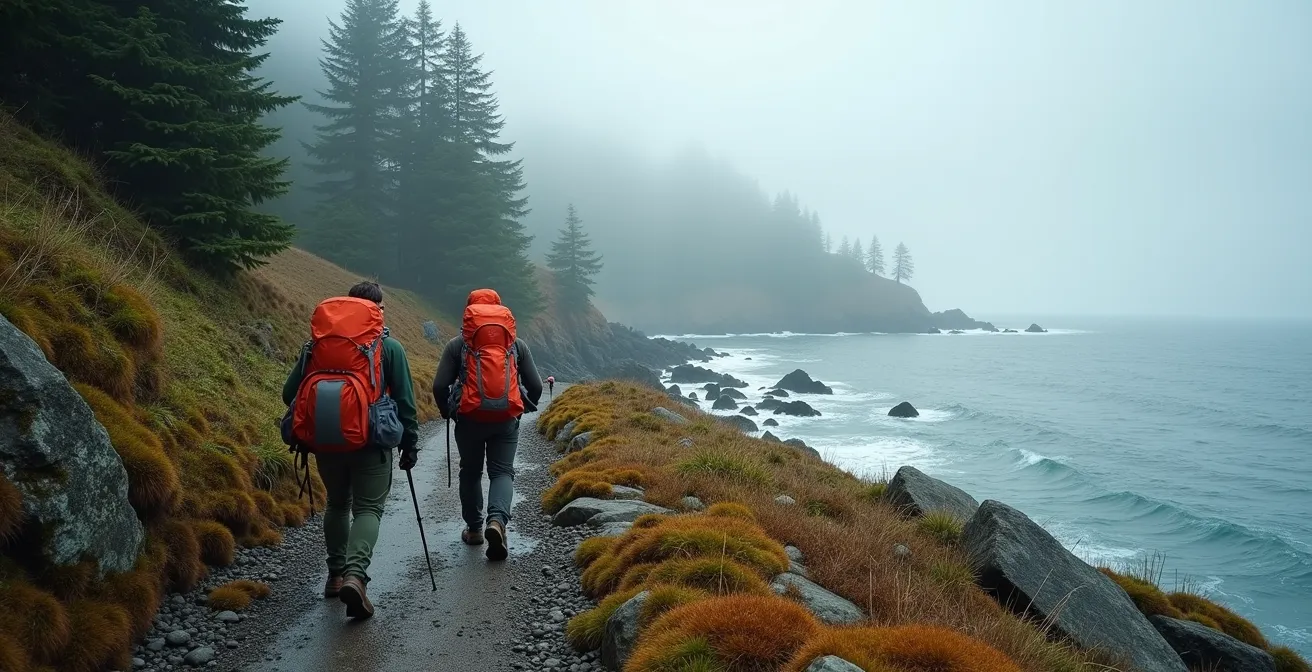
Navigating safely in these conditions requires proactive preparation, not reactive panic. The otherworldly atmosphere created by the fog, as noted in regions from Gros Morne to the Pacific Rim, can be beautiful, but it demands respect. Your senses of direction and distance become unreliable, making it easy to wander off a trail and towards a dangerous drop. Before heading out on any coastal trail in a fog-prone area like Tofino, you must have the right equipment and a clear plan.
Action Plan: Fog Safety Protocols for Coastal Trails
- Carry a GPS device or a traditional compass and map as essential backup navigation tools when visibility plummets.
- Always check tide schedules before any coastal walk, as fog can completely obscure the signs of a rapidly rising tide.
- Wear brightly coloured clothing to remain visible to other hikers, boaters, or potential rescue teams in low-visibility conditions.
- Use your hearing: listen for the sound of the ocean waves to maintain your orientation relative to the shoreline and unseen cliff edges.
- Set a conservative turnaround time based on the weather forecast and daylight hours, and stick to it regardless of your distance goals.
The key is to assume that fog is a possibility, even on a clear day, and to be fully equipped to navigate without relying on vision alone.
Do You Need a Guide or a Permit to Hike the Remote North Coast of Vancouver Island?
Hiking the remote trails of Northern Vancouver Island, such as the famous North Coast Trail or the Cape Scott Trail, requires careful planning regarding logistics, permits, and potentially, the use of a guide. The answer to whether you need these depends heavily on the specific trail you choose and your level of backcountry experience. These are not casual day hikes; they are serious wilderness undertakings where self-sufficiency is paramount. The requirements are in place to manage human impact on a fragile ecosystem and to ensure visitor safety in an area with significant inherent risks.
For most trails in this region, a guide is not mandatory, but highly recommended for those without extensive experience in rugged, multi-day coastal trekking. A guide brings invaluable local knowledge of tides, wildlife, and emergency procedures. However, permits are a different matter and are often non-negotiable. For example, hiking the North Coast Trail requires a permit, as does backcountry camping in Cape Scott Provincial Park. These permits must be secured in advance, especially for popular routes like the West Coast Trail (further south, but a good example of the system), which operates on a highly competitive reservation system.
The varying requirements reflect the different levels of risk and infrastructure on each trail. To clarify the specifics, it’s helpful to compare the requirements for the major northern island trails. This information is critical for the initial stages of your trip planning.
The following table, based on information from official sources like Parks Canada’s backcountry guidelines, breaks down the essential requirements for three key trails, highlighting the differences in risk and regulation.
| Trail | Guide Required | Permit Required | Key Risks |
|---|---|---|---|
| Cape Scott Trail | No | Backcountry Camping Permit | Remote location, weather exposure |
| North Coast Trail | Recommended | Yes | Tide-dependent passages, cable crossings |
| West Coast Trail | No | Reservation & Permit | Ladders, bridges, tidal shelves |
An honest assessment of your skills against the trail’s known hazards is the most important step in making a safe and responsible choice.
Why the “Rule of Twelfths” Matters for Your Beach Walk Safety?
On most of the world’s coastlines, the rhythm of the tides is a gentle ebb and flow. In Canada’s Bay of Fundy, it is a powerful, relentless force. Home to the highest tides on Earth, this is a place where the sea can advance with terrifying speed. In some areas, tidal measurements show that the water level can rise by as much as one foot per minute. For anyone exploring the ocean floor at low tide near formations like the Hopewell Rocks, underestimating this speed can be a fatal mistake. This is where the “Rule of Twelfths” becomes an essential tool for survival.
The Rule of Twelfths is a maritime guideline used to estimate the rate of water level change between high and low tide. It states that the tide does not rise or fall at a constant speed. Instead, its flow is slowest at the beginning and end, and fastest in the middle of the cycle. Over a typical six-hour tidal period, the water level will change according to this pattern:
- First Hour: Rises by 1/12th of the total tidal range.
- Second Hour: Rises by 2/12ths of the total range.
- Third Hour: Rises by 3/12ths of the total range (fastest period).
- Fourth Hour: Rises by 3/12ths of the total range (fastest period).
- Fifth Hour: Rises by 2/12ths of the total range.
- Sixth Hour: Rises by 1/12th of the total range.
This means that 50% of the total vertical water movement happens in just two hours—the third and fourth hours of the cycle. A beachcomber who wanders far out on the flats and begins their return journey during this peak flow period can find their exit routes cut off by rapidly filling channels in a shockingly short amount of time. You cannot outrun the incoming tide here. Your only defense is timing and awareness. To apply this rule, you must begin your return journey well before the third hour of the incoming tide begins, ensuring you are back on high ground before the water’s advance accelerates dramatically.
Before stepping onto the ocean floor, knowing the tide times is only half the battle. Understanding the *speed* at which that tide will return is what will keep you safe.
Why the Flowerpot Rocks Are Doomed to Collapse Eventually?
The iconic Flowerpot Rocks at Hopewell Cape, New Brunswick, are a symbol of the Bay of Fundy’s dramatic landscape. However, they are also temporary features on a geological timescale, destined for eventual collapse. Their existence is a delicate balance between creation and destruction, and the very forces that sculpted them are now actively working to tear them down. Their eventual demise is inevitable due to a powerful, two-front assault from daily tidal action and seasonal weather patterns.
The primary erosive force is tidal scouring. Twice a day, the world’s highest tides inundate the base of these sandstone formations, swirling with abrasive sediment that acts like liquid sandpaper. This constant action undercuts the base of the rocks, creating their distinctive “flowerpot” shape. While the upper portions remain wide, the narrow stems become progressively weaker over time. This process is relentless and measurable, slowly grinding away the foundations that support the massive weight above.
The second front in this assault comes from above. New Brunswick’s harsh winters subject the rocks to a punishing freeze-thaw cycle. Rain and meltwater seep into natural cracks and fissures in the upper sandstone layers. When this water freezes, it expands with immense force, widening the cracks. This cycle repeats countless times each winter, acting like a hydraulic wedge that fractures the rock from within. The 2003 collapse of the nearby “Elephant Rock” formation serves as a stark precedent, demonstrating exactly how this combination of basal scouring and internal fracturing leads to catastrophic failure. As Parks Canada grimly warns, an individual’s presence can have a direct impact.
Your weight could be the ‘final straw’ on a precariously balanced section of rock weakened by the forces described.
– Parks Canada, Gros Morne National Park safety guidelines
When you walk among them at low tide, you are walking in a landscape that is actively, and inevitably, deconstructing itself. Keeping a safe distance is an acknowledgement of this powerful natural process.
Key Takeaways
- A safe distance from a cliff is determined by assessing active geological signs (cracks, rockfall), not a fixed number.
- Seemingly stable ground can be compromised; tripod placement and weight distribution are critical risk factors.
- Coastal hazards like fog and tides are non-linear, requiring specific knowledge like the “Rule of Twelfths” to manage safely.
How to Find Fossils at Joggins Fossil Cliffs Without Breaking the Law?
The best way to find fossils at the Joggins Fossil Cliffs, a UNESCO World Heritage Site, is to walk the beach and look for fossils that have been naturally eroded from the cliffs and are now lying loose on the shore. Nova Scotia’s Special Places Protection Act strictly governs fossil collection here. The law allows you to look at and touch fossils anywhere, but it is illegal to use any tools—including hammers, chisels, or even simple digging implements—to remove a fossil that is embedded in the cliff face or in any large boulder.
The scientific value of a fossil is derived almost entirely from its geological context—the specific layer of rock in which it was found. This context tells paleontologists about the fossil’s age and the environment in which the organism lived 300 million years ago. Illegally prying a fossil from the cliff destroys this priceless historical record forever. The constant, powerful erosion from the Bay of Fundy’s tides does the work for you, continually exposing new fossils and depositing them on the beach. The most ethical and legal method of collecting is to become a responsible beachcomber.
Your best opportunity for a find is after a storm or a particularly high tide, which often uncovers new material. The general rule of thumb provided by the Joggins Fossil Centre is straightforward: if a fossil is loose on the beach and can fit in the palm of your hand, you are generally permitted to keep it. This ensures that only small, naturally displaced specimens are collected, while significant scientific finds remain in place to be properly documented by professionals. Should you discover a large, unusual, or particularly well-preserved fossil—such as a skull or a partial skeleton—you are legally and ethically obligated to leave it exactly where it is and report the find to the staff at the Joggins Fossil Centre immediately.
The Beachcomber’s Code: A Guide to Responsible Fossil Hunting
- Search only on the surface of the beach. Never dig, hammer, or use any tools on the cliffs or boulders.
- Collect only small, palm-sized specimens that are already loose and completely detached from the bedrock.
- Report any significant finds (large bones, skulls, trackways) to the Joggins Fossil Centre staff without touching or moving them.
- Photograph fossils that are embedded in the cliff face instead of attempting to remove them.
- Plan your visit for after a storm or a series of high tides for the best chances of finding newly eroded fossils legally.
Your responsible actions ensure that the scientific story of Joggins can continue to be told for generations to come. Your next step is to apply this risk-assessment mindset on every trail. Before you step forward, look for the evidence the landscape provides.
Frequently Asked Questions about Park Safety and Regulations
What does ‘slope instability’ on a closure sign actually mean?
It indicates recent geological movement, erosion, or structural weakness that makes the trail unsafe for passage, often triggered by heavy rain or freeze-thaw cycles.
What legal consequences exist for ignoring closure signs in Canada?
Violators may be charged under the Canada National Parks Act, face voided insurance claims, and personal liability for rescue costs.
What does Nova Scotia’s Special Places Protection Act allow for fossil hunting?
You can look and touch fossils on the beach, but cannot use tools or remove fossils embedded in cliff faces or large boulders.
What’s the best legal method to find fossils at Joggins?
Walk the beach after high tide when natural erosion deposits new fossils. If a fossil is loose on the beach and fits in your palm, it is likely okay to keep.