Contrary to popular belief, your expensive ‘waterproof’ jacket will fail in BC’s coastal rainforest; survival depends on a moisture management system, not a single piece of gear.
- Breathable-waterproof fabrics (like Gore-Tex) stop working in 100% humidity, trapping sweat and making you wet from the inside.
- Success lies in layering, mechanical ventilation, and understanding that some gear is meant to get wet while a core dry layer is protected at all costs.
Recommendation: Ditch the idea of staying completely dry. Instead, adopt a systematic approach to manage inevitable dampness and protect your core insulation to prevent hypothermia.
For a backpacker accustomed to the dry heat of arid canyons, the prospect of a week in British Columbia’s coastal rainforest can be daunting. The threat isn’t just a passing shower; it’s a pervasive, atmospheric dampness that challenges the very definition of “waterproof.” Most hikers arrive armed with the usual advice: buy a good Gore-Tex jacket, pack everything in dry bags, and hope for the best. They believe their high-tech gear is an impermeable shield against the elements.
But this conventional wisdom falls apart in a truly saturated environment. In a place where annual precipitation is measured in metres, not centimetres, the battle isn’t against rain—it’s against humidity itself. The real danger isn’t getting wet from the outside, but from the inside, as your own perspiration gets trapped against your skin by gear that can no longer breathe. So, what if the key wasn’t a better jacket, but a completely different philosophy? What if success depended not on repelling every drop, but on intelligently managing moisture as a complete system?
This guide deconstructs the common failures of standard rain gear in BC’s unique climate. We will explore the physics of why your jacket fails, analyze the best protection for your lower body against trail sludge, and cover the essential survival skills of fire-making and navigation when everything is wet and technology is unreliable. Finally, we’ll address the critical risk of hypothermia and the logistical hurdles of even getting to the trailhead, providing you with a complete system for not just surviving, but thriving in the relentless wet.
This article breaks down the expert-level strategies required to handle the intense, persistent moisture of the Pacific Northwest. The following sections provide a complete roadmap, from gear selection to survival skills, built for the realities of a saturated rainforest environment.
Summary: A Hiker’s Guide to BC’s Saturated Rainforests
- The Rain Jacket Mistake: Why Gore-Tex Doesn’t Work in 100% Humidity?
- Gaiters or Waterproof Pants: Which Offers Better Protection Against Trail Sludge?
- How to Build a Fire When Every Piece of Wood is Saturated?
- Why Compass Navigation is More Reliable Than GPS Under Dense Canopy?
- Tarp vs Tent: Which Shelter Dries Faster for Multi-Day Trips?
- Wet and Cold: Why Hypothermia is a Risk Even at 10°C in the Woods?
- Short-Term Volunteering: Can You Really Help a Project in Just One Day?
- How to Avoid Vancouver Traffic When Driving the Sea-to-Sky Highway to Whistler?
The Rain Jacket Mistake: Why Gore-Tex Doesn’t Work in 100% Humidity?
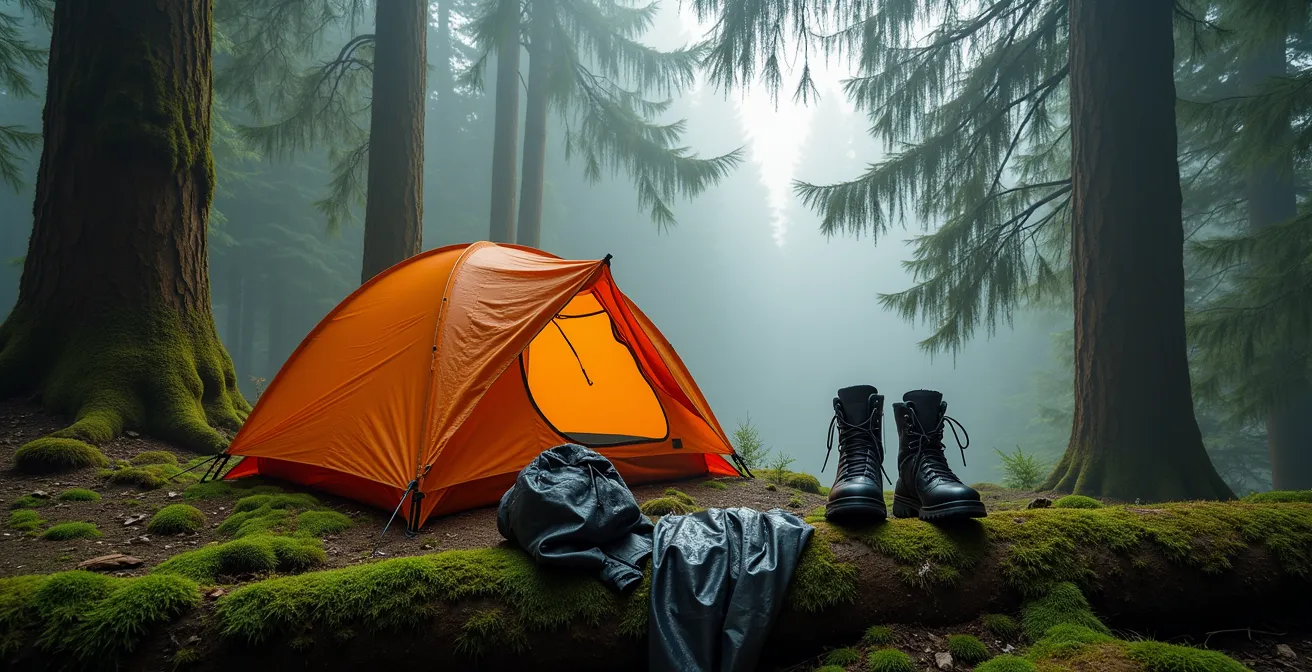
The biggest mistake hikers make in BC’s rainforest is placing absolute faith in breathable-waterproof fabrics like Gore-Tex. These materials work based on a pressure and temperature gradient: the heat and humidity inside your jacket must be higher than outside for water vapour (sweat) to be pushed through the membrane’s microscopic pores. In a region where the Pacific Rim National Park Reserve confirms the region receives over 300cm of rain annually, the outside air is often at 100% humidity. When this happens, the gradient disappears. Your jacket’s breathability drops to zero, and it effectively becomes a plastic bag, trapping sweat inside. This is called ‘wetting out,’ and it leaves you soaked from your own perspiration.
The solution is not a more expensive jacket, but a smarter system focused on mechanical ventilation. This means actively managing airflow. Use pit zips, cuff adjustments, and the main front zipper to dump hot, moist air. For high-exertion activities like a steep ascent, a non-breathable but fully vented shell like a simple PVC poncho or a dedicated venting jacket can be far superior. The goal shifts from ‘staying dry’ to ‘managing wet’. You must accept that your outer layer will be damp; its job is to block wind and rain while you manage the moisture underneath.
This system-based approach requires dedicated layers. A merino wool base layer manages moisture against the skin, a light fleece provides insulation even when damp, and your shell jacket acts as the weather barrier. The most critical component, however, is what’s in your pack: a completely separate set of base layers and socks sealed in a high-quality dry bag. This is your ‘sleep-only’ dry set, the foundation of your waterproofing integrity. No matter how wet you get during the day, this core set remains pristine, ensuring you can get warm and dry in your tent to prevent a dangerous drop in body temperature overnight.
Action Plan: Building Your BC Moisture Management System
- Assess your layers: Ensure you have a merino base layer, a synthetic insulating mid-layer, and both a breathable and a non-breathable (or highly vented) shell option.
- Isolate your dry core: Purchase a high-quality, durable dry bag dedicated solely to one full set of base layers and socks for sleeping. This bag is non-negotiable.
- Practice mechanical ventilation: Before your trip, get used to actively using your jacket’s zippers and adjustments to dump heat during light exercise.
- Treat your gear: Re-apply a Durable Water Repellent (DWR) treatment to your breathable jacket. This won’t stop it from wetting out in high humidity, but it will help water bead off in lighter rain, delaying saturation.
- Pack for shelter: Include a lightweight silnylon tarp. It can be deployed instantly for a lunch break in the rain, protecting you and your pack, and preserving your energy.
Gaiters or Waterproof Pants: Which Offers Better Protection Against Trail Sludge?
Once you’ve addressed your upper body system, the next failure point is your legs and feet. The trails in coastal BC are legendary for their mud—a thick, boot-sucking sludge that can overtop your boots and soak your socks in an instant. This is where the debate between gaiters and waterproof pants becomes critical. While waterproof pants offer complete coverage against rain and wet ferns during bushwhacking, they suffer from the same lack of breathability as jackets in high humidity. On a gruelling uphill climb, they can quickly turn into a sauna for your legs.
Gaiters, on the other hand, offer a more targeted and ventilated solution. A pair of heavy-duty, knee-high gaiters made from a tough material like Cordura creates a fortress around your lower legs and the tops of your boots. They protect your expensive hiking pants from the worst of the mud and abrasion, prevent water from pouring into your boots from the top, and still allow your upper legs to breathe. For the specific conditions of trails like the West Coast Trail, where you encounter both deep mud and abrasive barnacles on coastal sections, the durability of robust gaiters is paramount.
The optimal choice often depends on a combination of trail conditions and personal preference. However, for multi-day trips in the heart of the rainforest, a hybrid approach is often best: pack both. Use the lightweight, breathable gaiters for the majority of hiking, and keep the full waterproof pants in your pack for torrential downpours or for use around camp on a cold, wet evening. This modular system provides the most versatility while optimizing for ventilation and waterproofing integrity.
The following comparison breaks down the strengths and weaknesses of each system for typical BC trail conditions, as detailed in an analysis of trail gear by Vancouver Trails.
| Feature | Gaiters | Waterproof Pants |
|---|---|---|
| West Coast Trail Mud | Excellent – protects boots | Good – full coverage |
| Bushwhacking Wet Ferns | Limited – legs exposed | Excellent – full protection |
| Weight | Light (200-400g) | Heavy (400-800g) |
| Ventilation | Excellent | Poor in humidity |
| Durability Against Barnacles | Heavy-duty Cordura needed | Full pants vulnerable |
How to Build a Fire When Every Piece of Wood is Saturated?
In a saturated environment, the ability to create fire is a critical survival skill, providing warmth, a psychological boost, and a means to dry gear. However, every piece of wood on the forest floor is likely to be completely waterlogged. The secret lies in bypassing the wet outer layers to find the dry heartwood within. Your primary target is standing deadwood, specifically trees like Western Red Cedar. While the bark and sapwood will be soaked, the inner heartwood can be perfectly dry and is often resinous, making it an excellent fuel.
This technique requires a tool. A small hatchet or a sturdy knife and baton are essential for splitting a forearm-sized piece of standing deadwood. Once you split it open, you can shave fine, feathery curls from the exposed dry interior. These shavings are your tinder. Another invaluable natural resource is ‘fatwood’—the resin-impregnated heartwood of pine trees, often found in stumps or at the base of dead branches. This wood is naturally waterproof and highly flammable.

However, reliance on natural materials alone is a mistake. Your fire-making kit must be redundant and absolutely waterproof. This kit should contain multiple ignition sources, such as a ferrocerium rod and a storm-proof lighter, as well as reliable tinder like cotton balls soaked in petroleum jelly or commercial fire starters. Always remember that fire is a privilege, not a right. Before even considering a fire, you must check the BC Wildfire Service website for current bans. In many sensitive areas and during high-risk seasons, fires are prohibited. In these cases, a reliable canister stove is not just a backup; it is your primary cooking and water-purifying tool.
Why Compass Navigation is More Reliable Than GPS Under Dense Canopy?
In the steep-sided valleys and under the ultra-dense canopy of BC’s temperate rainforest, technology is fickle. The same towering cedars and Douglas firs that create the magical atmosphere also form a near-impenetrable barrier for GPS signals. It is common for GPS units and smartphones to lose their lock, fail to update, or provide dangerously inaccurate readings. In areas like Strathcona Provincial Park on Vancouver Island, the combination of thick forest and steep fjord walls creates significant satellite signal blackouts. Relying solely on a GPS device in these conditions is a recipe for disaster.
This is why traditional map and compass skills are not just a backup; they are the primary system for navigation. A topographic map from Natural Resources Canada (NRCAN) and a quality baseplate compass are immune to battery failure and signal loss. They provide a complete, reliable picture of the terrain, allowing you to use techniques like aiming off, taking bearings, and reading contour lines to pinpoint your location and plot a safe route. This fundamental skill is the bedrock of backcountry safety.
Local expertise further underscores this point. Highly respected volunteer organizations like North Shore Rescue, which operates in the mountains just outside Vancouver, place immense value on analog methods. As noted in the documentary *Search and Rescue: North Shore*:
North Shore Rescue meticulously maintains its own maps of local trails, complete with shortcuts and crucial terrain details, ensuring efficient and safe rescue operations.
– Knowledge Network Documentary, Search and Rescue: North Shore
This highlights a critical lesson: even the professionals who use the best technology available build their foundation on robust, reliable, and non-digital tools. For any backpacker entering the BC backcountry, mastering the compass is not an old-fashioned suggestion—it’s a modern-day necessity for ensuring you can find your way out.
Tarp vs Tent: Which Shelter Dries Faster for Multi-Day Trips?
Your choice of shelter is a cornerstone of your moisture management system. A modern, double-wall tent provides excellent bug protection and a sense of security, but it has a significant drawback in a saturated environment: it is slow to dry. The multiple layers of fabric, mesh, and zippers trap moisture. Packing up a wet tent in the morning means you’re carrying several extra pounds of water weight, and you’re introducing a huge amount of dampness into your pack. When you set it up again in the evening, the interior is often still damp and condensation-prone.
A simple silnylon or silpoly tarp, on the other hand, is the master of ventilation. With its open-sided design, a tarp allows for constant airflow, which is the single most important factor in staying dry and combating condensation. While a tarp requires more skill to pitch effectively and offers less protection from insects, its advantages in a wet climate are profound. A single layer of fabric has a huge surface area and can be shaken out and dried by even a faint breeze or a few moments of weak sun. It can be set up high off the ground to maximize airflow or pitched low in an A-frame to shed torrential rain and wind. This versatility is unmatched.
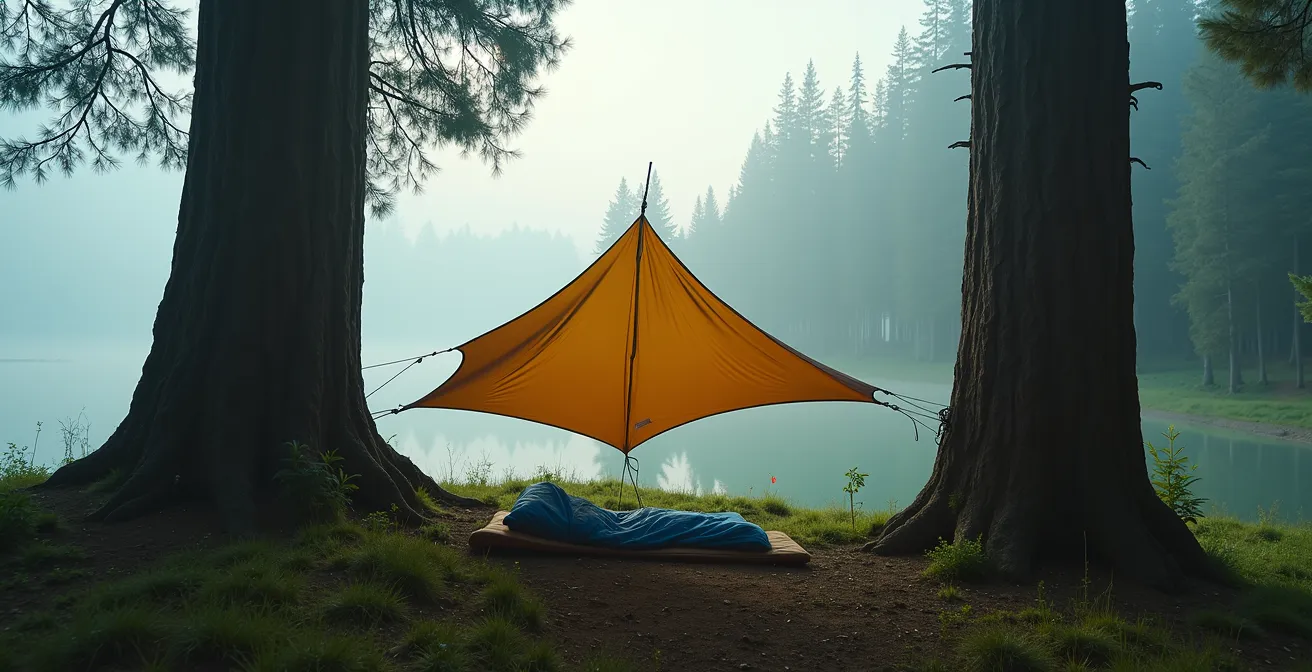
The decision also involves managing ambient moisture. As Parks Canada warns, even in summer, fog is a common feature on the West Coast Trail. This persistent, fine mist can saturate a poorly ventilated tent. A tarp, combined with a waterproof bivy sack for your sleeping bag, creates a two-stage defense that maximizes airflow while protecting your insulation. For the experienced backpacker focused on efficiency and moisture management on a multi-day trip in coastal BC, a tarp system is often the superior choice for its fast-drying and lightweight properties.
Wet and Cold: Why Hypothermia is a Risk Even at 10°C in the Woods?
The most serious threat in the BC rainforest is not bears or getting lost—it’s hypothermia. Many hikers underestimate this risk, assuming that a “cool” temperature of 10°C (50°F) is not cold enough to be dangerous. This is a fatal mistake. Hypothermia occurs when your body loses heat faster than it can produce it, causing a drop in your core body temperature. Water is the great accelerator of this process; it strips heat from your body 25 times faster than air of the same temperature.
When your clothes get wet—either from rain or from the trapped sweat we discussed earlier—they lose all of their insulating value. A 10°C day with wind and wet clothes can be more dangerous than a -5°C day with dry clothes. Your body will burn through its energy reserves just trying to stay warm, leading to shivering, confusion, and poor decision-making. The first signs are often subtle: the “umbles”—stumbles, mumbles, fumbles, and grumbles. This is your brain, starved of warmth and energy, beginning to fail.
The antidote is your moisture management system. It’s not about being a tough “rain-or-shine” hiker; it’s about rigorously protecting your insulation and having that sacred, bone-dry set of clothes to change into. The chilling words of a North Shore Rescue search manager after a real-world rescue on a BC mountain drive this point home. As reported by Castanet News about a hypothermic hiker, the situation was dire:
He was wearing cotton clothing, his clothes were soaked and if he was up there all night, I don’t think he would have survived.
– John Blown, Search Manager, North Shore Rescue
This quote, involving the deadly mistake of wearing cotton, underscores the reality. In the cool, wet woods, even mild temperatures are a threat. Your survival depends entirely on respecting the cold and managing the wet.
Key Takeaways
- Waterproofing is a system, not a product. Your strategy must manage moisture from both inside and out.
- Breathable fabrics fail in 100% humidity. Prioritize mechanical ventilation (pit zips, etc.) over fabric specs.
- Hypothermia is a risk even in cool temperatures (10°C) when you are wet. Protecting a dry core clothing layer is your primary survival task.
Short-Term Volunteering: Can You Really Help a Project in Just One Day?
While the focus is on self-sufficiency, one of the best ways to learn the practical skills needed to thrive in BC’s backcountry is to learn from the people who build and maintain the trails. Short-term, single-day volunteering opportunities offer a unique chance to give back to the environment while gaining invaluable, hands-on knowledge. It may seem like one day is too short to make a difference, but the cumulative impact is massive.
Organizations like the BC Parks Foundation and various regional trail societies frequently organize “trail days.” On these days, volunteers work alongside experienced crew leaders on critical tasks like building boardwalks over muddy sections, digging drainage channels to manage water flow, and clearing fallen trees. This is a practical masterclass in water management. You learn firsthand how water shapes the landscape and what it takes to build sustainable infrastructure that can withstand the constant moisture. An impact report from the Outdoor Recreation Fund of BC shows the power of this model, noting that since spring 2024, volunteers have maintained over 250 km of trails and engaged hundreds of participants.
Participating in one of these days connects you to the local hiking community and provides a deeper appreciation for the trails you use. You’re not just a tourist passing through; you’re an active steward of the land. The skills you learn—how to read the terrain for water flow, the proper way to use tools, the importance of trail hardening—are directly applicable to your own backcountry trips. It’s a powerful way to transform your relationship with the environment from one of extraction to one of reciprocity, and in doing so, you become a more competent and aware backpacker.
To get involved, you can:
- Contact the BC Parks volunteer program directly for a list of upcoming opportunities.
- Join established partner organizations like the Ridge Meadows Outdoor Club or the Southern Vancouver Island Nature Trails Society.
- Check the BC Parks Foundation website for single-day maintenance events open to the public.
How to Avoid Vancouver Traffic When Driving the Sea-to-Sky Highway to Whistler?
Your BC rainforest adventure doesn’t begin at the trailhead; it begins on the Sea-to-Sky Highway (Highway 99), the stunning and often congested artery connecting Vancouver to Whistler. Failing to plan for this drive can mean starting your trip stressed and delayed. The drive is a beautiful journey, but it is shared by commuters, tourists, and weekend warriors, creating predictable but severe traffic jams.
The key to a smooth start is strategic timing. On a summer Saturday, the highway is packed with hikers heading for trailheads in Garibaldi Provincial Park. To beat this rush, you must either leave Metro Vancouver before 6 AM or wait until after 10 AM. The return journey is just as critical. Sunday afternoons, especially after 3 PM, are notoriously slow as everyone heads back to the city. The same logic applies in winter, where a fresh powder day can gridlock the highway with skiers heading to Whistler Blackcomb.
While the Vancouver to Whistler drive typically takes about 2 hours to cover its 115 kilometers in ideal conditions, peak times can easily double that. Instead of sitting in traffic, plan your trip around it. Consider staying in Squamish or Whistler on a Sunday night and driving back Monday morning for a completely clear run. Alternatively, turn the traffic into an opportunity. If you hit a jam, pull off at one of the highway’s many points of interest, like the Britannia Mine Museum or Porteau Cove Provincial Park, and wait for the congestion to ease. A successful trip is not just about surviving the wilderness but also about navigating the civilization required to get there.
Here are some key timing tips to avoid the worst of the traffic:
- Summer Saturdays (Northbound): Leave before 6 AM or after 10 AM.
- All Sundays (Southbound): Avoid driving towards Vancouver between 3 PM and 8 PM.
- Winter Powder Days (Northbound): Skip the 6 AM departure rush; consider going later in the day.
- Beat the Return: Stay Sunday night and enjoy a leisurely drive back on Monday morning.
Now that you are equipped with the systems, skills, and logistical knowledge to tackle the BC rainforest, the final step is to put it all into practice. Start by auditing your current gear not for its brand name, but for its role within your new moisture management system.