For the serious Northern traveller, relying solely on the Kp-index is a recipe for missed opportunities; true mastery lies in triangulating solar data with local Canadian weather and geography.
- Optimal aurora viewing depends more on clear skies and local conditions, like those in February, than a high planetary Kp number.
- Technical preparation, from pre-focusing your lens in the dark to understanding how your camera meters a polar bear in snow, is non-negotiable for professional-quality shots.
Recommendation: Shift your focus from chasing a high Kp number to mastering the environmental and technical variables—this is the key to guaranteeing a return on your significant travel investment.
You’ve invested thousands of dollars and travelled to the far reaches of the Canadian North. The goal: to witness and capture the aurora borealis, the planet’s most spectacular light show. Every forum and basic guide points to one thing: the Kp-index. You’re told to download an app, wait for a Kp of 4 or 5, and hope for the best. But for a traveller who demands a scientific approach to maximizing their chances, this is simply not enough. What if a breathtaking, shimmering display happens at Kp 2? What if a predicted Kp 6 is completely obscured by a thin layer of high-altitude cloud you never saw coming?
This approach leaves too much to chance. The common advice overlooks the critical variables that separate a frustrating night in the cold from a life-changing experience. It ignores the subtle interplay of solar wind data, the unique meteorological phenomena of the Arctic, and the crucial differences between competing Canadian aurora hubs like Yellowknife and Whitehorse. It doesn’t prepare you for the technical challenges of operating a camera at -35°C or the biological reality of why the lights look different to your eyes than they do on your screen.
This guide offers a different path. We will move beyond the Kp-index to build a more robust forecasting model. Think of this as your masterclass in Northern photography, treating the aurora not as a lucky sighting but as a celestial event you can strategically intercept. We will delve into the science of weather, the art of cold-weather photography for both auroras and iconic wildlife like polar bears, and the practicalities of budgeting and thriving in the extreme, beautiful environments of the Yukon and beyond.
This article provides a comprehensive roadmap for the dedicated chaser. Explore the sections below to master each component of your Northern expedition, from optimal timing to the financial planning required for a trip to Churchill.
Summary: A Masterclass in Northern Canadian Sky and Wildlife Photography
- Why February Offers Better Aurora Visibility Than November in Yellowknife?
- How to Focus Your Lens on Infinity in Pitch Black Conditions?
- The Layering Strategy That Keeps You Warm at -35°C for 4 Hours?
- Yellowknife or Whitehorse: Which City Has Less Light Pollution for Viewing?
- Camera vs Eye: Why Do the Lights Look Greener on Your Screen?
- How to Sleep Soundly When the Sun Never Sets in July?
- Why Your Automatic Settings Turn Polar Bears Grey Instead of White?
- How to Budget for a Polar Bear Trip to Churchill: Is $5,000 Enough?
Why February Offers Better Aurora Visibility Than November in Yellowknife?
When planning a trip to the “Aurora Capital of North America,” timing is paramount. While Yellowknife boasts an incredible 240 nights per year of potential aurora visibility, not all months are created equal. Many travellers look at the long nights of November and assume it’s a peak time, but seasoned chasers know that February holds a distinct meteorological advantage. The secret lies not in the aurora’s strength, but in the sky’s clarity.
November in the Northwest Territories is a transitional month, characterized by fluctuating temperatures, higher humidity, and a greater propensity for cloud cover. In contrast, February plunges the region into a deep, stable cold. This extreme cold is your greatest ally. As temperatures drop towards -35°C or -40°C, the atmosphere’s ability to hold moisture plummets. In fact, most cloud types simply cannot form at temperatures below -32°C.
This phenomenon means February provides a significantly higher statistical probability of crystal-clear, cloud-free nights. You could have a massive G3 geomagnetic storm in November, but it’s worthless if it’s hidden behind a blanket of grey. A moderate but active aurora under a piercingly clear February sky is infinitely more rewarding. The cold, dense air also reduces atmospheric haze, making the stars and the aurora itself appear sharper and more brilliant. For the photographer, this means less “noise” and more pristine data for your sensor to capture. Choosing February over November isn’t just a preference; it’s a strategic decision to stack the odds of a clear view firmly in your favour.
How to Focus Your Lens on Infinity in Pitch Black Conditions?
You’re out in the pristine Yukon wilderness, the aurora begins its cosmic ballet, and you raise your camera only to capture a blurry, green mess. This is one of the most common and frustrating failures for aspiring aurora photographers. In the pitch black of the arctic night, autofocus is useless, and manually finding the tiny infinity symbol on your lens is nearly impossible. The solution is to prepare your gear with a simple but foolproof technique before you even leave your hotel.
The method involves setting your focus during daylight and then physically locking it in place. This removes the single biggest point of failure during a nighttime shoot. A few minutes of preparation saves hours of frustration and ensures your expensive gear can perform its function when the moment arrives. This is a non-negotiable step in the photographer’s equation for a successful aurora chase. It requires discipline and a small roll of a photographer’s best friend: gaffer tape.
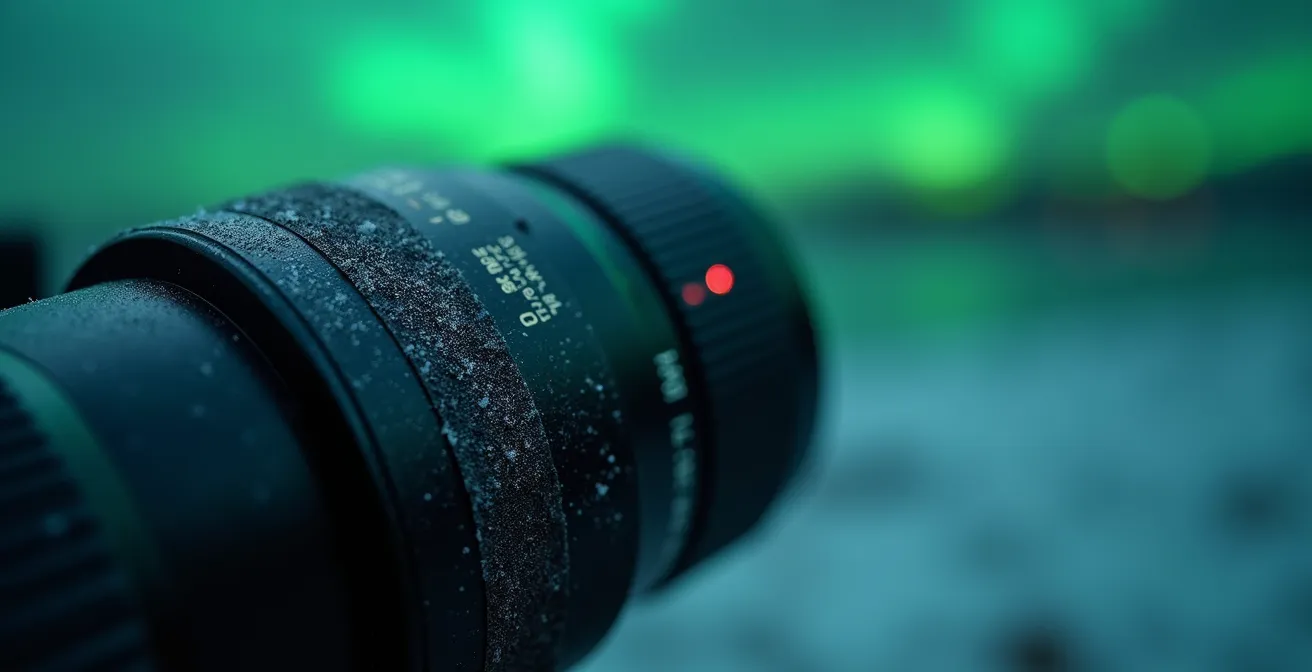
As you can see in the image, the technique is brutally simple yet effective. The tape physically prevents the focus ring from moving, even when bumped or jostled inside your camera bag. The light frost visible on the lens barrel is a testament to the extreme conditions where this technique becomes essential, not optional. Mastering this setup is a rite of passage for any serious cold-region photographer.
Action Plan: Auditing Your Lens for Arctic Night Conditions
- Establish Focus Point: During daylight, use autofocus on the most distant object possible (a far-off mountain, a tree on the horizon) to achieve perfect infinity focus.
- Secure the Setting: Without moving the focus ring, immediately switch your lens from Autofocus (AF) to Manual Focus (MF). This electronically disengages the focus motor.
- Verify Physical Lock: Apply a strip of gaffer tape firmly across the focus ring and the lens barrel. This creates a physical lock, ensuring the focus cannot be accidentally changed.
- Audit Frost Prevention: Keep your lens cap on at all times until the aurora appears. This prevents frost from forming on the front element, which would ruin your shot.
- Integrate into Workflow: Place the pre-focused camera in its protective bag between shots to maintain settings and protect it from the elements, finalizing your cold-weather shooting plan.
The Layering Strategy That Keeps You Warm at -35°C for 4 Hours?
Your ability to capture the aurora is directly proportional to how long you can comfortably—and safely—endure the extreme cold. At -35°C, with even a slight wind, exposed skin can suffer from frostbite in minutes. A robust layering strategy isn’t about fashion; it’s about survival and extending your operational window. The key principle is trapping air, which is an excellent insulator, between multiple, breathable layers. Cotton is your enemy; it holds moisture and freezes. Your entire system should be built from wool or synthetic technical fabrics.
The classic three-layer system for your torso and legs is the starting point: a moisture-wicking base layer (merino wool or synthetic), a fleece or down mid-layer for insulation, and a windproof/waterproof outer shell. However, your extremities are the most vulnerable. A high-quality insulated parka and snow pants are non-negotiable. For your head, a warm beanie (toque, in Canadian parlance) and a neck gaiter or balaclava are essential to prevent heat loss. Insulated, arctic-rated boots are perhaps the single most important investment.
Nowhere is this strategy more critical than your hands, which need to both stay warm and operate a camera. A three-layer glove system is the professional’s choice:
- Layer 1: Thin liner gloves, often with touchscreen-compatible fingertips, allowing you to manipulate camera buttons and dials without exposing your skin.
- Layer 2: Thick fleece or wool mittens worn over the liners. These provide the primary insulation and should be removed only for brief moments of camera adjustment.
- Layer 3: A windproof outer shell mitten that goes over everything, protecting you from the brutal windchill. Keeping a chemical hand warmer inside this outer mitten creates a small pocket of life-saving heat.
Remember that the cold attacks your equipment as well. As photographers know, the 100-degree temperature differential between the -35°C outdoors and a +20°C hotel room can cause debilitating condensation inside your gear. Keep spare batteries warm in an inside pocket, as cold can cut their life by over 50%.
Yellowknife or Whitehorse: Which City Has Less Light Pollution for Viewing?
Choosing your base of operations is a critical decision. Both Yellowknife, NWT, and Whitehorse, Yukon, are world-class destinations sitting directly under the auroral oval. However, they offer different geographical advantages when it comes to escaping city light pollution. The goal is to reach a “dark sky” site, rated as Bortle 2 or 3, as quickly as possible. Here, the local topography and road networks play a decisive role.
Whitehorse is situated in a deep river valley. This geography is a significant advantage, as the surrounding mountains and hills act as a natural shield, blocking a large portion of the city’s light dome. A relatively short drive, approximately 25 minutes north on the Klondike Highway, can transport you to exceptional dark-sky locations. Popular viewing spots like Fish Lake Road and Chadburn Lake Road offer easily accessible pull-offs with wide-open views, shielded from the glow of downtown.
Yellowknife, by contrast, is built on the much flatter terrain of the Canadian Shield. This means its light dome is more pervasive and can be seen from a greater distance. Reaching a similarly dark sky requires a longer drive, often 35 minutes or more out on the famous Ingraham Trail. However, Yellowknife holds a unique seasonal trump card. By late winter (February/March), the Dettah Ice Road is fully operational. This road, built directly on the frozen surface of Great Slave Lake, provides access to viewing platforms in the middle of the lake, offering a perfectly flat, 360-degree horizon with absolutely no obstructions—an experience impossible to replicate from a land-based viewpoint in Whitehorse.
This comparative table, based on information from local resources like data from aurora tour operators, breaks down the key differences in accessibility.
| Location | Dark Sky Access | Terrain | Popular Viewing Spots |
|---|---|---|---|
| Whitehorse | 25 min on Klondike Highway to Bortle 2 | River valley shields from light dome | Chadburn Lake Road, Fish Lake Road |
| Yellowknife | 35 min on Ingraham Trail to similar quality | Flat terrain, pervasive light dome | Vee Lake Road, Dettah Ice Road |
Camera vs Eye: Why Do the Lights Look Greener on Your Screen?
This is the great paradox of aurora chasing that can lead to disappointment if not understood beforehand. You see a vibrant, dancing green ribbon on your camera’s LCD screen, but when you look up, you see a much fainter, whitish-grey shimmering cloud. Are your eyes broken? No. You are experiencing the fundamental difference between human night vision and a camera’s long-exposure capabilities. This is the “Human-Eye Paradox.”
The science is fascinating and directly impacts your viewing experience. As visual perception research explains, your retina contains two types of photoreceptor cells: cones and rods.
Your eye has two types of sensors: high-resolution colour ‘Cones’ for daytime and low-resolution monochrome ‘Rods’ for night. During a faint aurora, you are seeing with your Rods, so it appears as a greyish, shimmering cloud.
– Aurora physiology explanation, Visual perception research on aurora viewing
Cones are responsible for colour vision but require a lot of light to activate. Rods are exquisitely sensitive to low light levels but cannot perceive colour. During a faint or moderately active aurora, there simply isn’t enough light to trigger your cones. You are seeing the aurora primarily with your rods, which interpret it in shades of grey. A camera sensor, however, has no such limitation. During a 10 or 15-second long exposure, it can gather thousands of times more light than your eye can in a single instant. This allows it to accumulate enough photons to reveal the aurora’s true green and sometimes pink colours, which are generated by excited oxygen atoms at different altitudes.

This split image perfectly illustrates the concept. On the left is the subtle, ethereal beauty your dark-adapted eyes will perceive. On the right is the vibrant, saturated spectacle your camera will capture. Both are real, but they are different sensory experiences. Only during an extremely intense geomagnetic storm (e.g., Kp 7 or higher) will the aurora be bright enough to activate your cones, allowing you to see vivid colours with the naked eye. Understanding this manages expectations and allows you to appreciate both the delicate visual experience and the spectacular photographic results.
How to Sleep Soundly When the Sun Never Sets in July?
While winter is prime time for aurora, Northern Canada is also a spectacular summer destination, offering endless daylight for hiking and wildlife viewing. This presents a unique challenge: how do you get restful sleep when the sun is still shining brightly at midnight? The “midnight sun” can severely disrupt your circadian rhythm, the internal body clock that regulates your sleep-wake cycle. For your body, continuous daylight is a powerful signal to stay awake, making it difficult to fall asleep and reducing sleep quality.
Hotel curtains, even so-called “blackout” ones, are often insufficient. They leak light from the sides, top, and bottom, preventing the true, absolute darkness your brain needs to produce melatonin, the sleep hormone. The solution is to take matters into your own hands with a simple, inexpensive, and incredibly effective DIY method that can be sourced from any Canadian Tire in the North.
The secret weapon is aluminum foil. By cutting sheets of foil to the exact size of your window panes and taping them directly to the glass with painter’s tape (which won’t damage the paint or trim), you can create a 100% light-proof seal. Another excellent option is to use Coroplast (corrugated plastic sheets), which can be cut to size and wedged into the window frames for a less permanent but equally effective solution. Creating this artificial night is the single most effective way to protect your sleep.
To further aid your body’s adjustment, you can supplement with melatonin. In Canada, you’ll find that over-the-counter melatonin is available at any Shoppers Drug Mart or local pharmacy. Taking a low dose about an hour before your desired bedtime can help signal to your brain that it’s time to sleep, even when the sun is telling it otherwise. Combined with a total blackout environment, this strategy ensures you can get the restorative sleep needed to enjoy the long days of an arctic summer adventure.
Why Your Automatic Settings Turn Polar Bears Grey Instead of White?
After auroras, the polar bear is the other iconic subject of the Canadian North. You’re in Churchill, Manitoba, you have a magnificent bear framed against a pristine snowy landscape, you take the shot on ‘Auto’, and the result is a dull, underexposed image with a grey bear and muddy-looking snow. This is another classic technical failure, rooted in the same principles as focusing in the dark: you cannot trust your camera’s automatic brain in extreme conditions.
The problem lies in your camera’s light meter. It is programmed with a fundamental assumption that the world, on average, reflects 18% of light. This is known as “middle grey.”
Your camera’s light meter is programmed to see the world as ‘middle grey’. When it sees a vast, bright white scene—a polar bear in the snow—it assumes it’s ‘too bright’ and darkens the photo.
– Photography technical explanation, Understanding camera metering systems
To the camera, the brilliant white snow is an anomaly. It diligently “corrects” this perceived overexposure by darkening the image, turning your whites into greys. To get a photo that reflects what your eyes see—a white bear on white snow—you must manually override the camera’s logic. This is done using exposure compensation. By telling your camera to intentionally overexpose the shot by +1.0 to +1.7 stops, you are correcting its inherent bias and pushing those greys back to the brilliant whites they should be.
The best practice is to shoot in Aperture Priority or Manual mode and use your histogram and “highlight alerts” (the ‘blinkies’ on your LCD) as your guide. The goal is to “push the histogram to the right” as far as possible without “clipping” the highlights, which would mean losing all detail in the brightest parts of the snow or fur. This technique ensures you capture the full dynamic range of the scene, rendering the polar bear in its majestic, true-to-life white.
Key takeaways
- True aurora mastery transcends the Kp-index, requiring analysis of local weather, solar wind data (like Bz), and geography.
- Technical proficiency is non-negotiable in the Arctic: from pre-focusing your lens to manually compensating for snow exposure, you must override your camera’s automatic settings.
- Success and comfort in the North depend on practical preparation, including strategic layering for extreme cold and total blackout solutions for the midnight sun.
How to Budget for a Polar Bear Trip to Churchill: Is $5,000 Enough?
A trip to see the polar bears in Churchill, Manitoba, is a bucket-list journey, but it comes with a significant price tag. The remote location, short peak season, and limited infrastructure make it one of Canada’s more expensive domestic travel experiences. So, is a budget of $5,000 CAD per person realistic? The answer is yes, but it requires careful planning and places you firmly in the mid-range category.
The biggest expenses are flights and the Tundra Buggy or lodge-based tours. There is no road to Churchill; access is by plane or train from Winnipeg. Flights alone often consume $1,200-$1,800 of your budget. A single day trip on a Tundra Buggy can cost upwards of $500, while multi-day, all-inclusive lodge packages quickly run into the high thousands. The table below gives a realistic breakdown of costs, showing that a budget of $3,000 is a tight squeeze, while $4,500-$5,000 is a comfortable mid-range target for a short trip.
This budget breakdown, drawing on figures from tour operators and regional travel boards, clarifies where the money goes.
| Expense Category | Budget Option | Mid-Range | Premium |
|---|---|---|---|
| Flight (Winnipeg-Churchill) | $1,200 | $1,500 | $1,800 |
| Tundra Buggy Day Trip | $500 | $800 | $1,200 |
| Accommodation (3 nights) | $900 | $1,500 | $3,000 |
| Meals & Incidentals | $400 | $700 | $1,000 |
| Total | $3,000 | $4,500 | $7,000 |
Case Study: Shoulder Season Savings Strategy
The most effective way to manage costs is to travel during the shoulder seasons. As highlighted by experts at sources like Canadian Geographic, visiting in early October or late November can yield savings of 15-25% on tours and lodging compared to the peak period of late October to mid-November. Early October offers a unique “bears without snow” photographic experience, while late November provides dramatic scenes of bears on the newly formed sea ice. The key to this strategy is booking far in advance—often 12 to 18 months ahead—to secure the limited spots available.
With this comprehensive understanding of the scientific, technical, and practical realities of a Northern Canadian expedition, you are now equipped to plan a trip that maximizes your return on investment. The next step is to translate this knowledge into a concrete itinerary and start booking.